
Leaf-Tile Bathroom Remodel
A bathroom taken down to the studs and rebuilt with a tub surround tiled over waterproofing, a leaf-pattern accent wall, sliding glass tub doors and a long vanity.
Before the tile went up
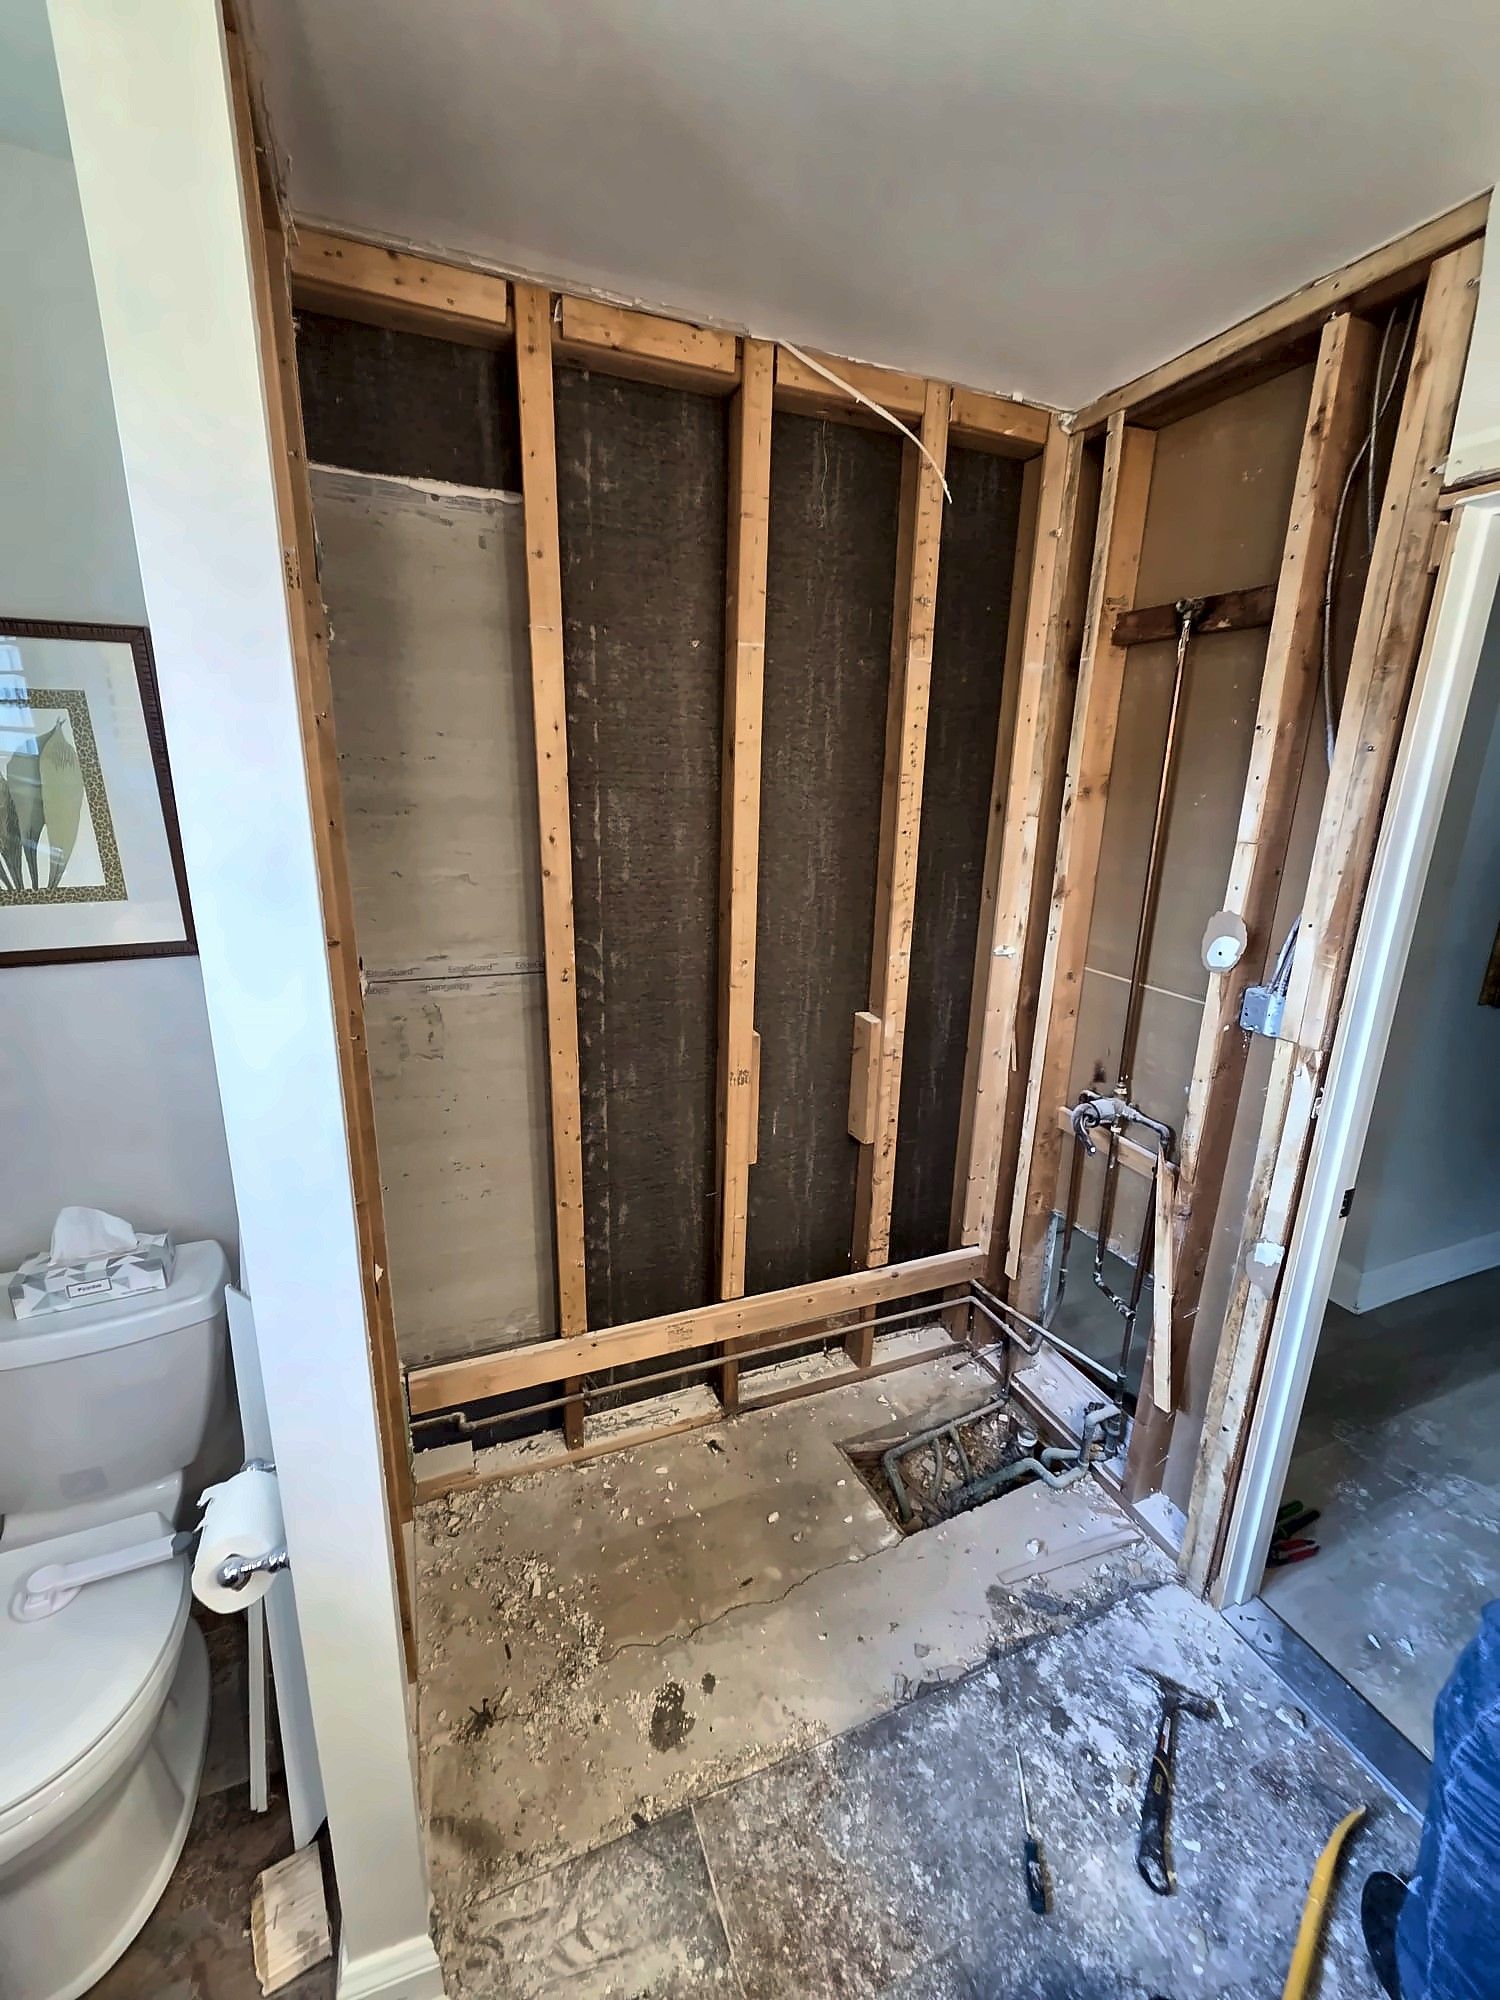
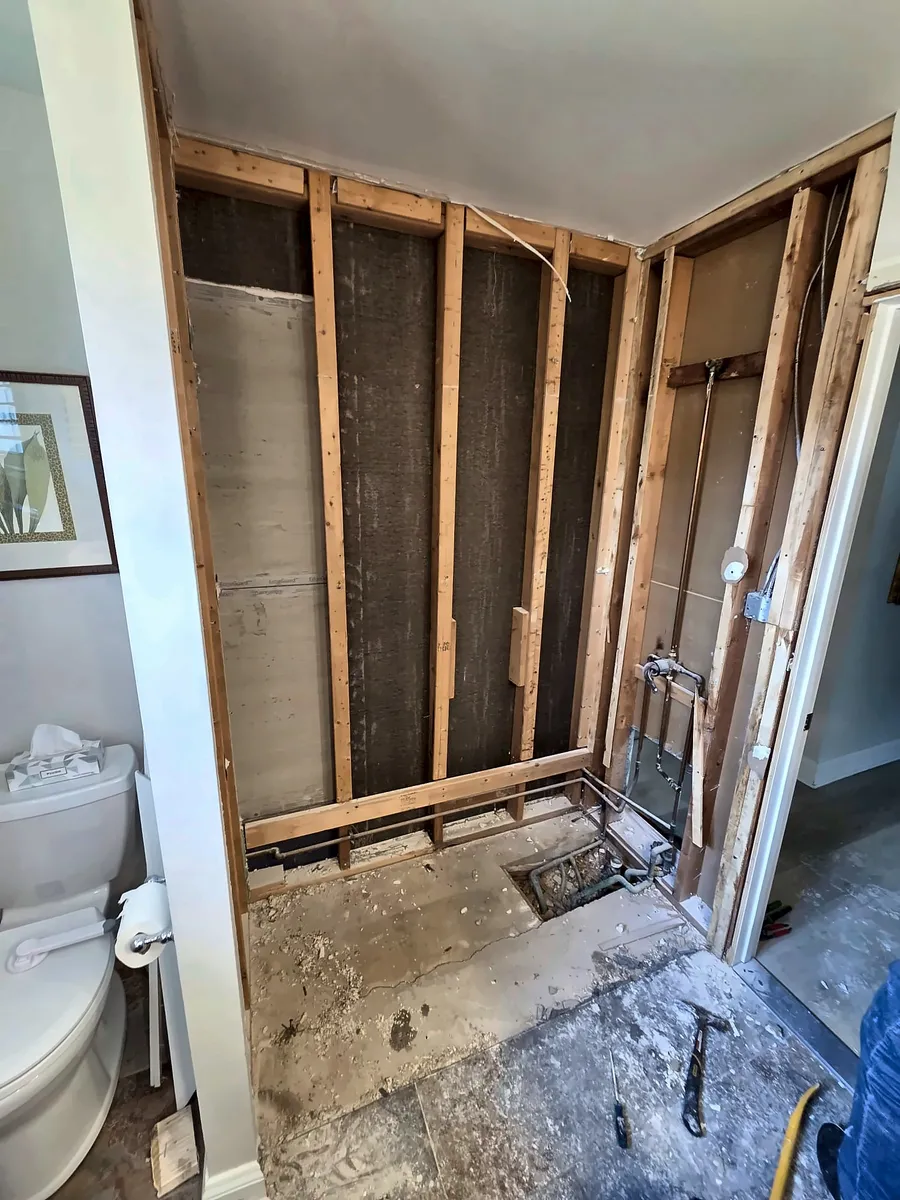
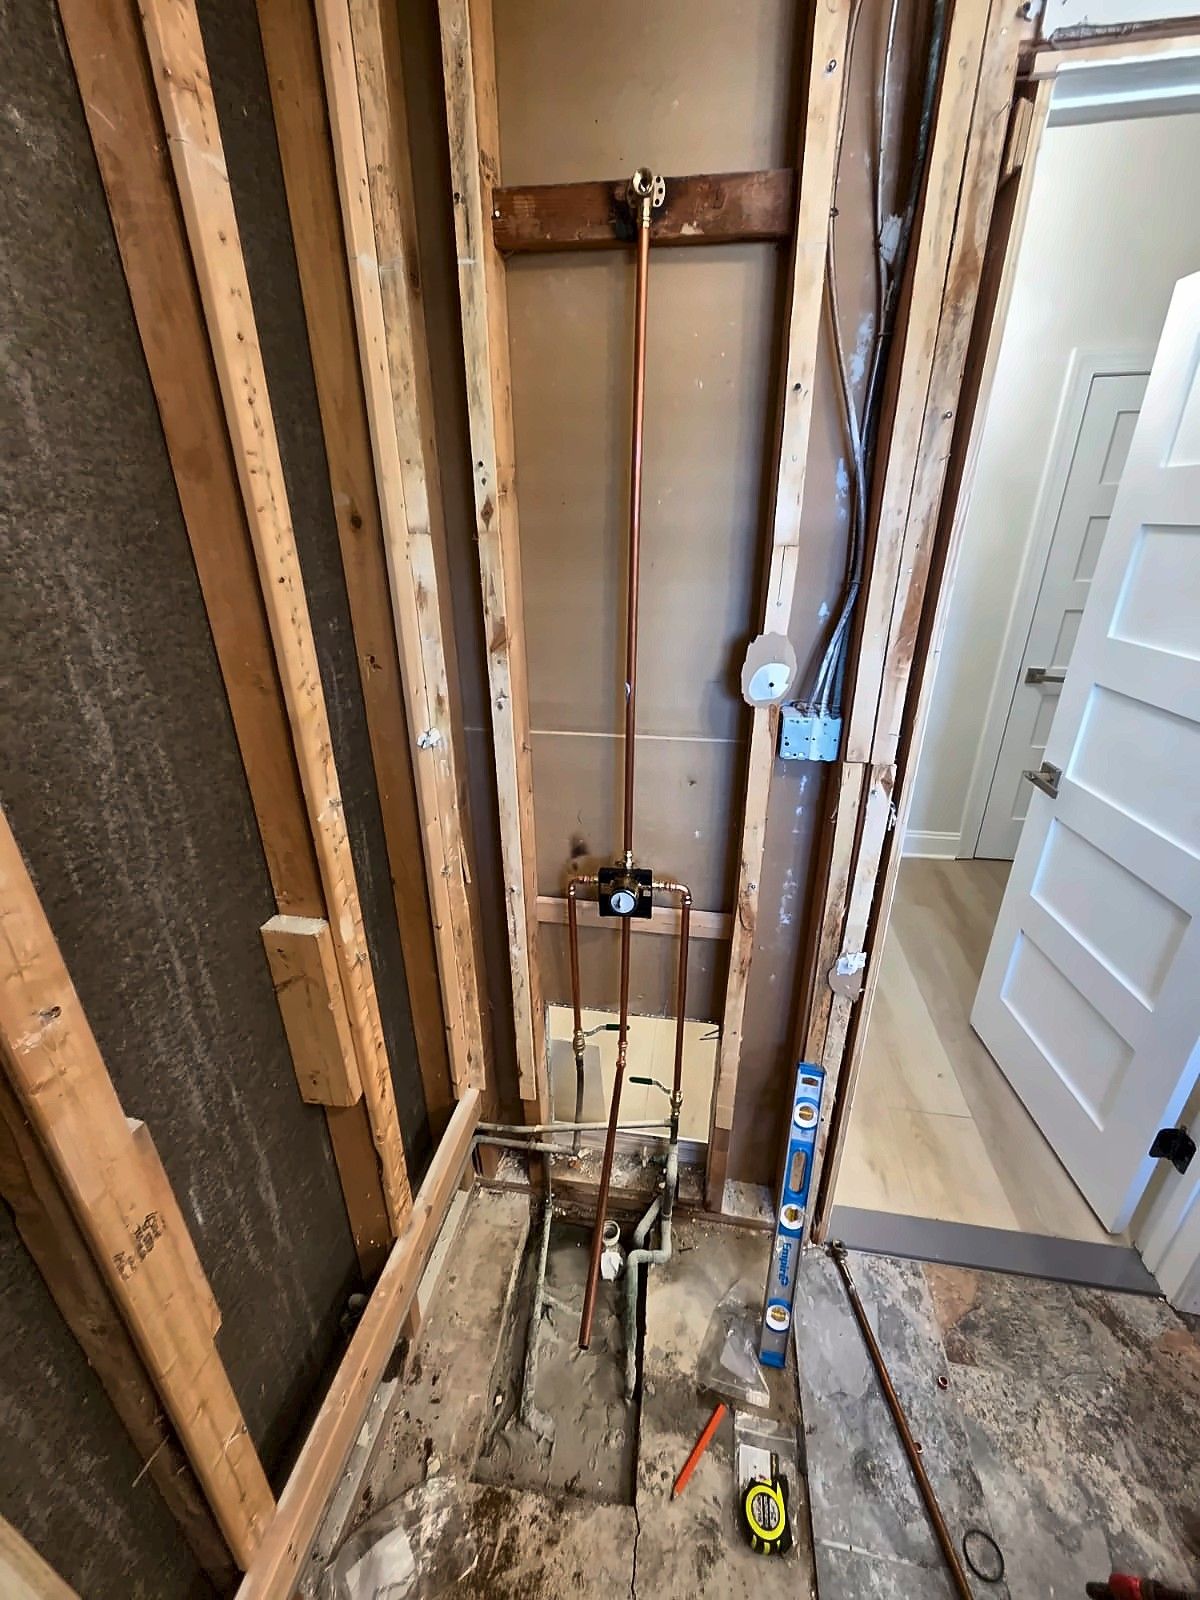
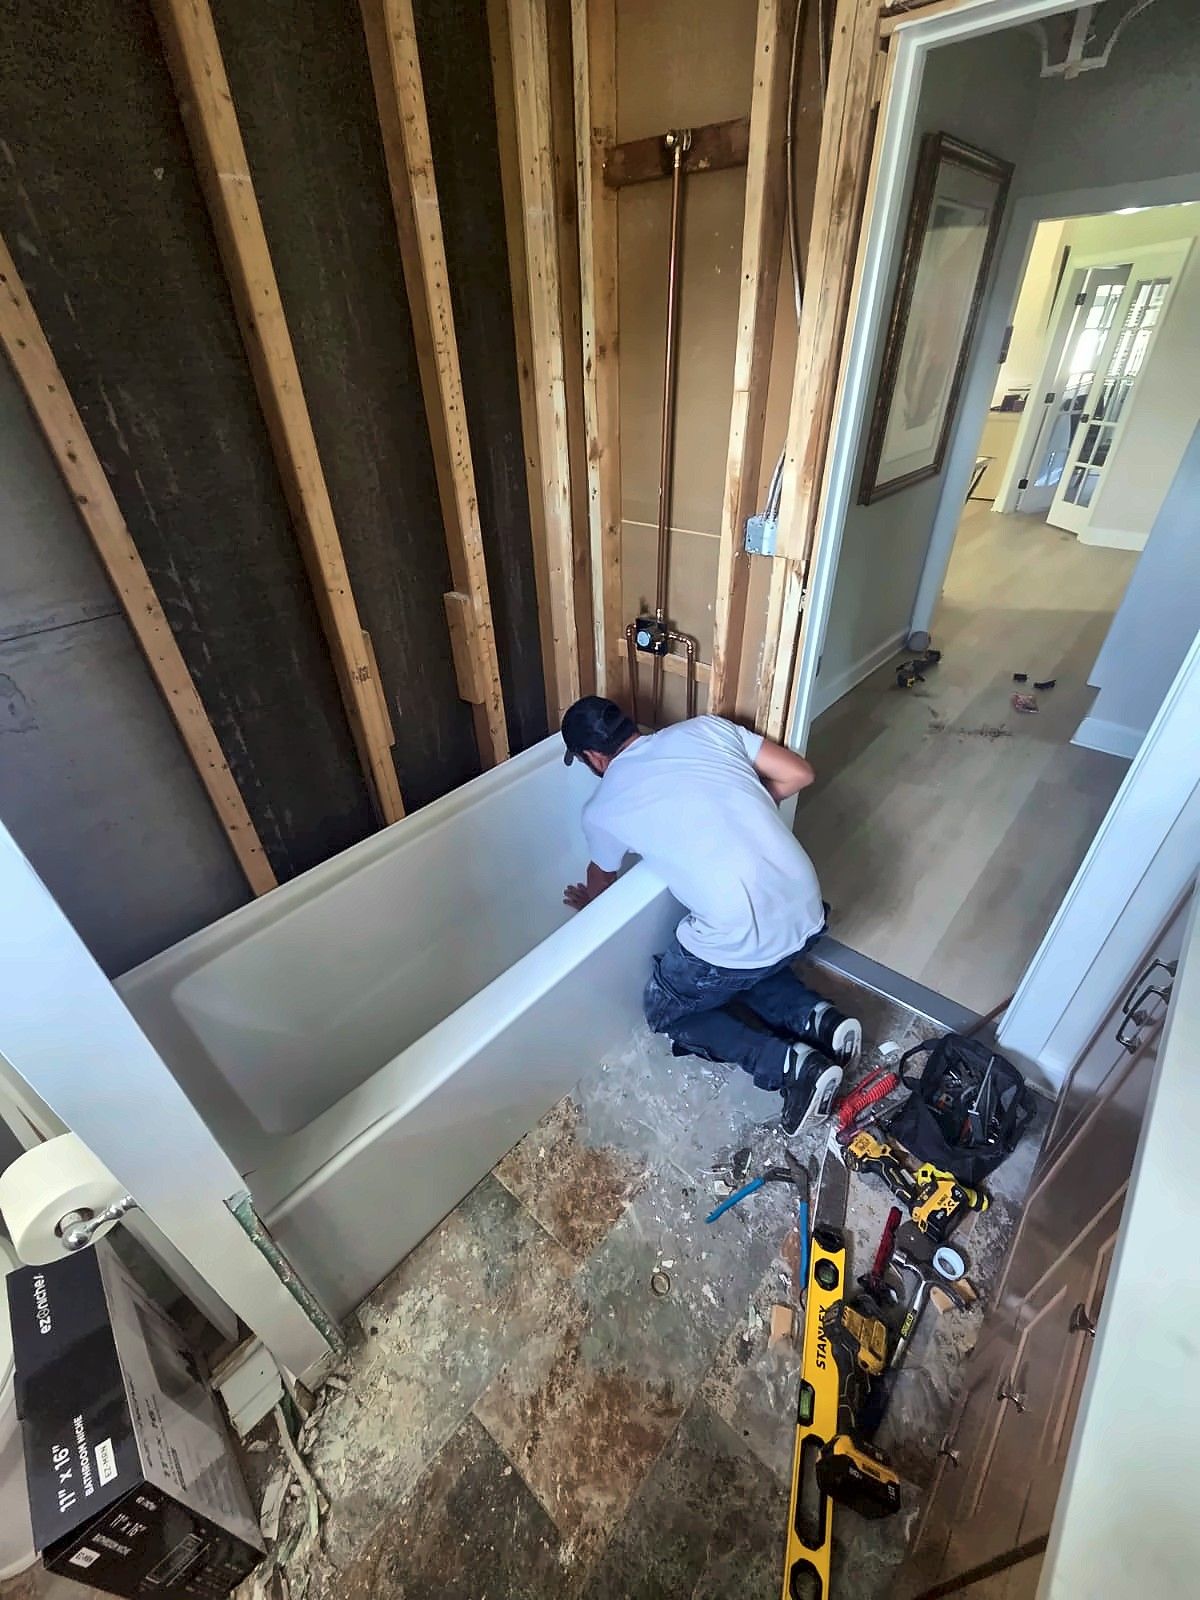
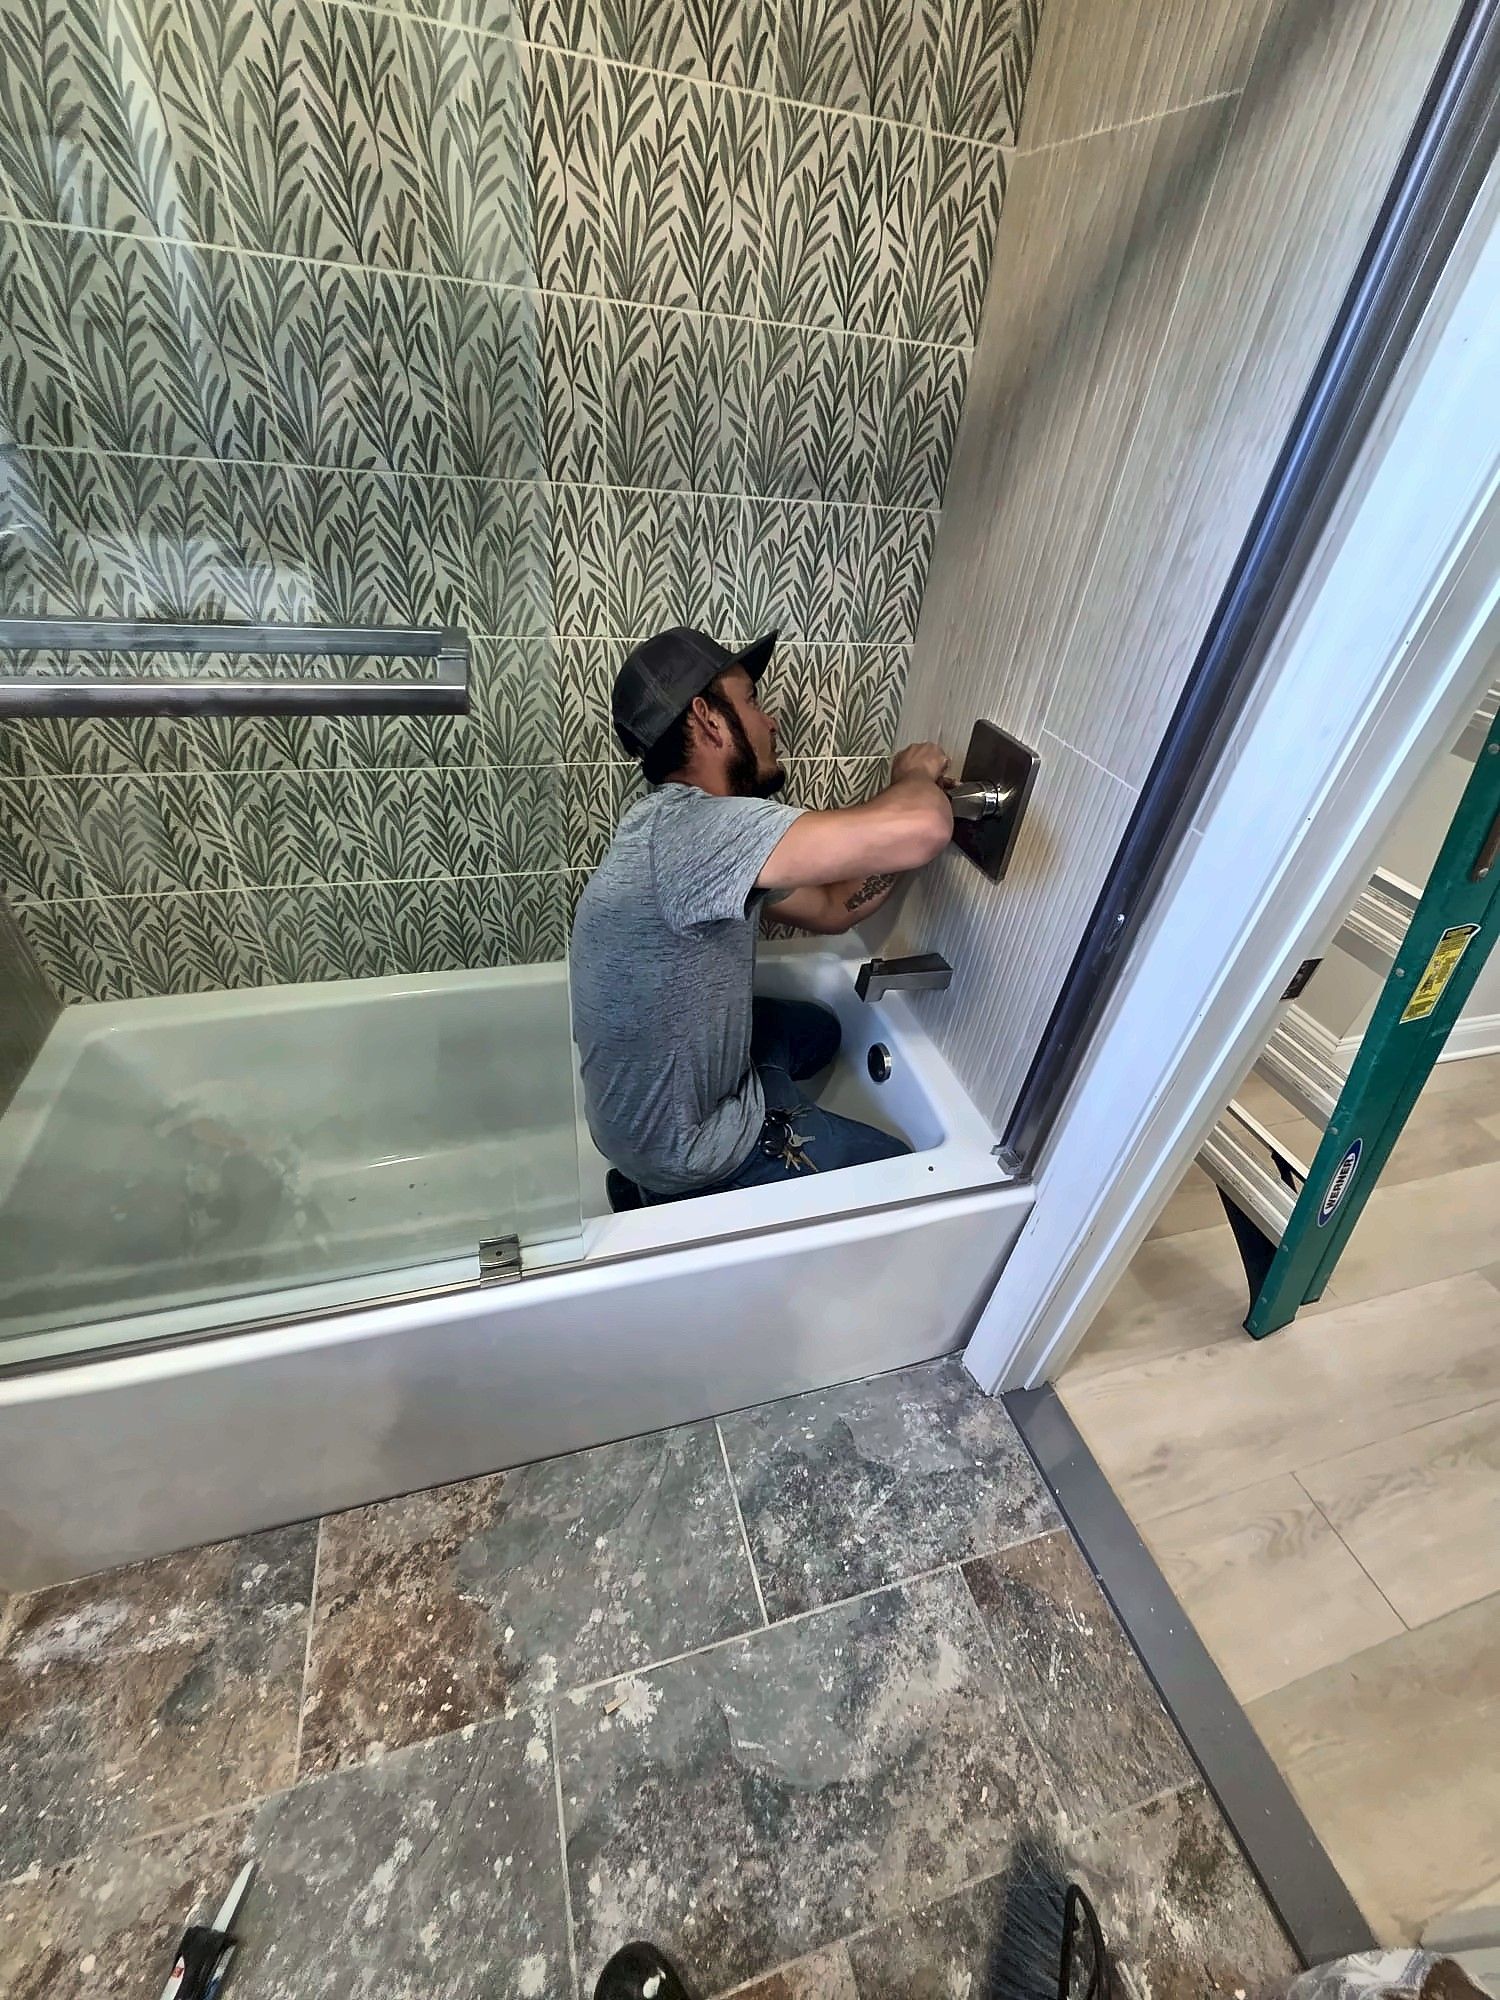
We took this bathroom down to the studs. Walls and the old surround came out, the subfloor was exposed, and the room was cleaned out before anything new went in. With the framing open, the new supply lines and shower valve went in, and we set a new tub in the gutted room.
Building the surround
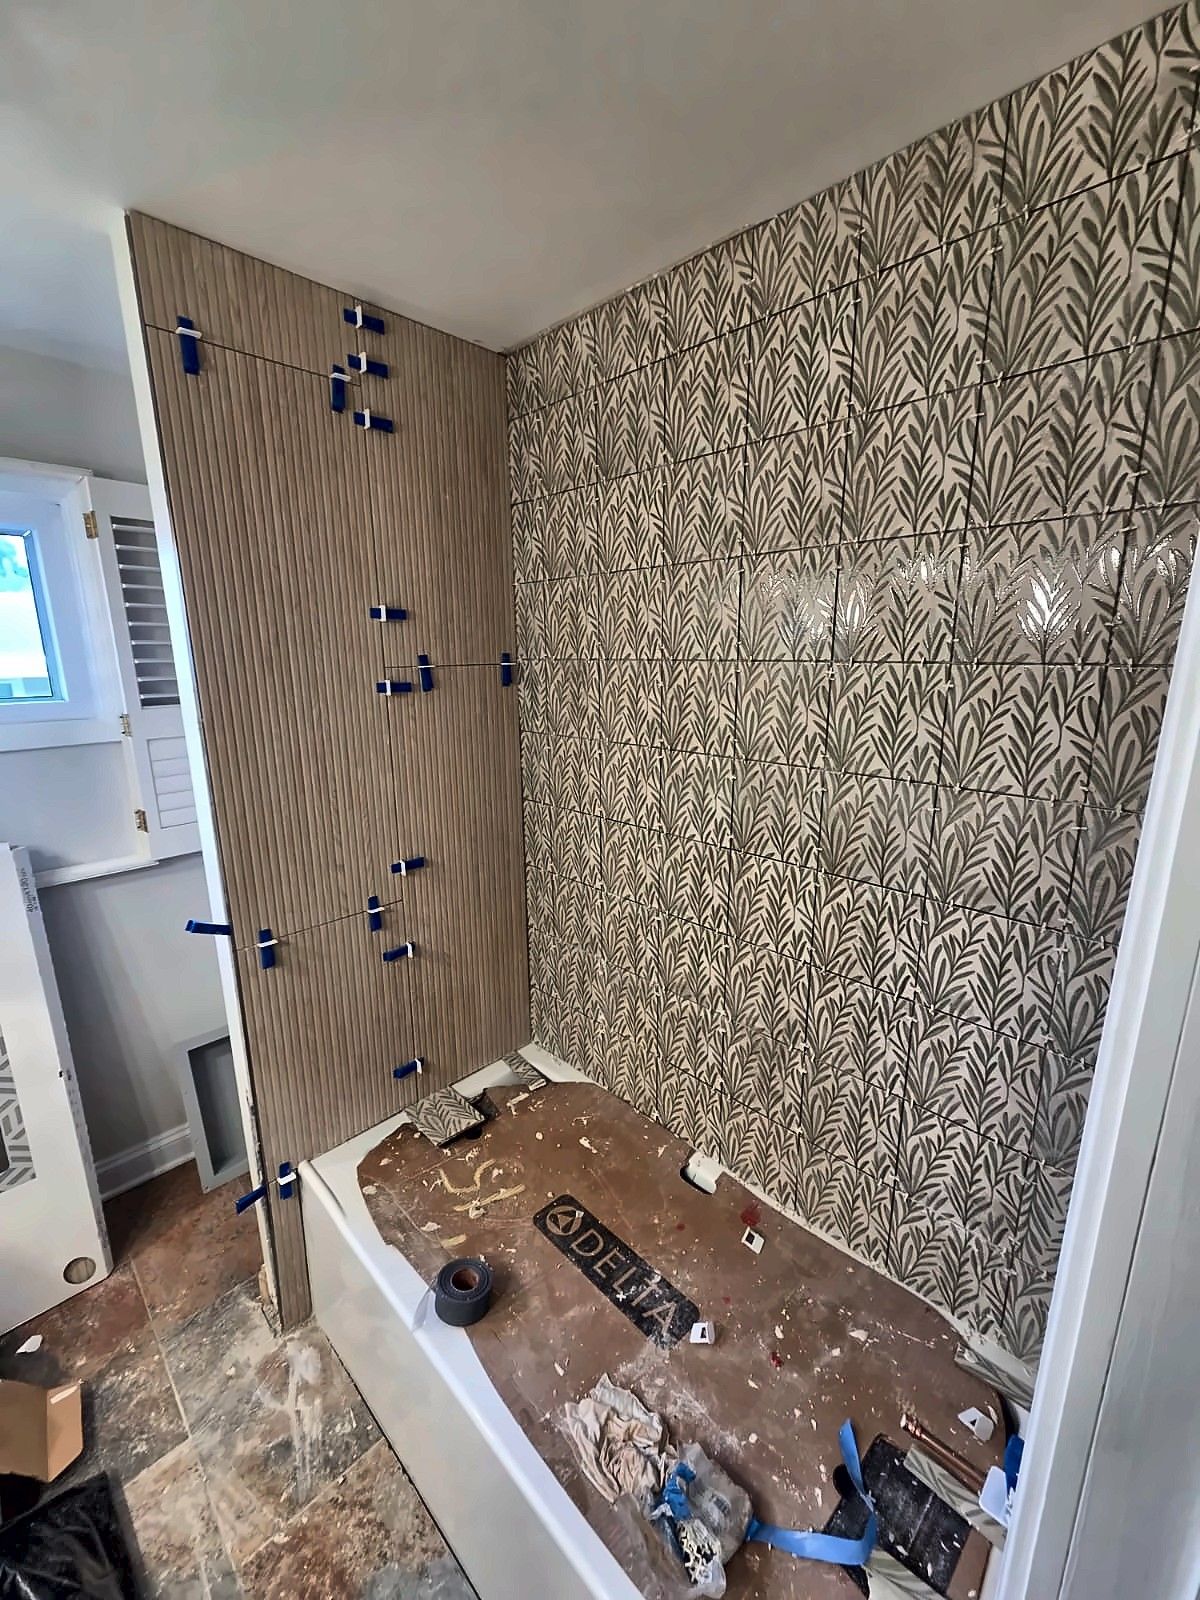
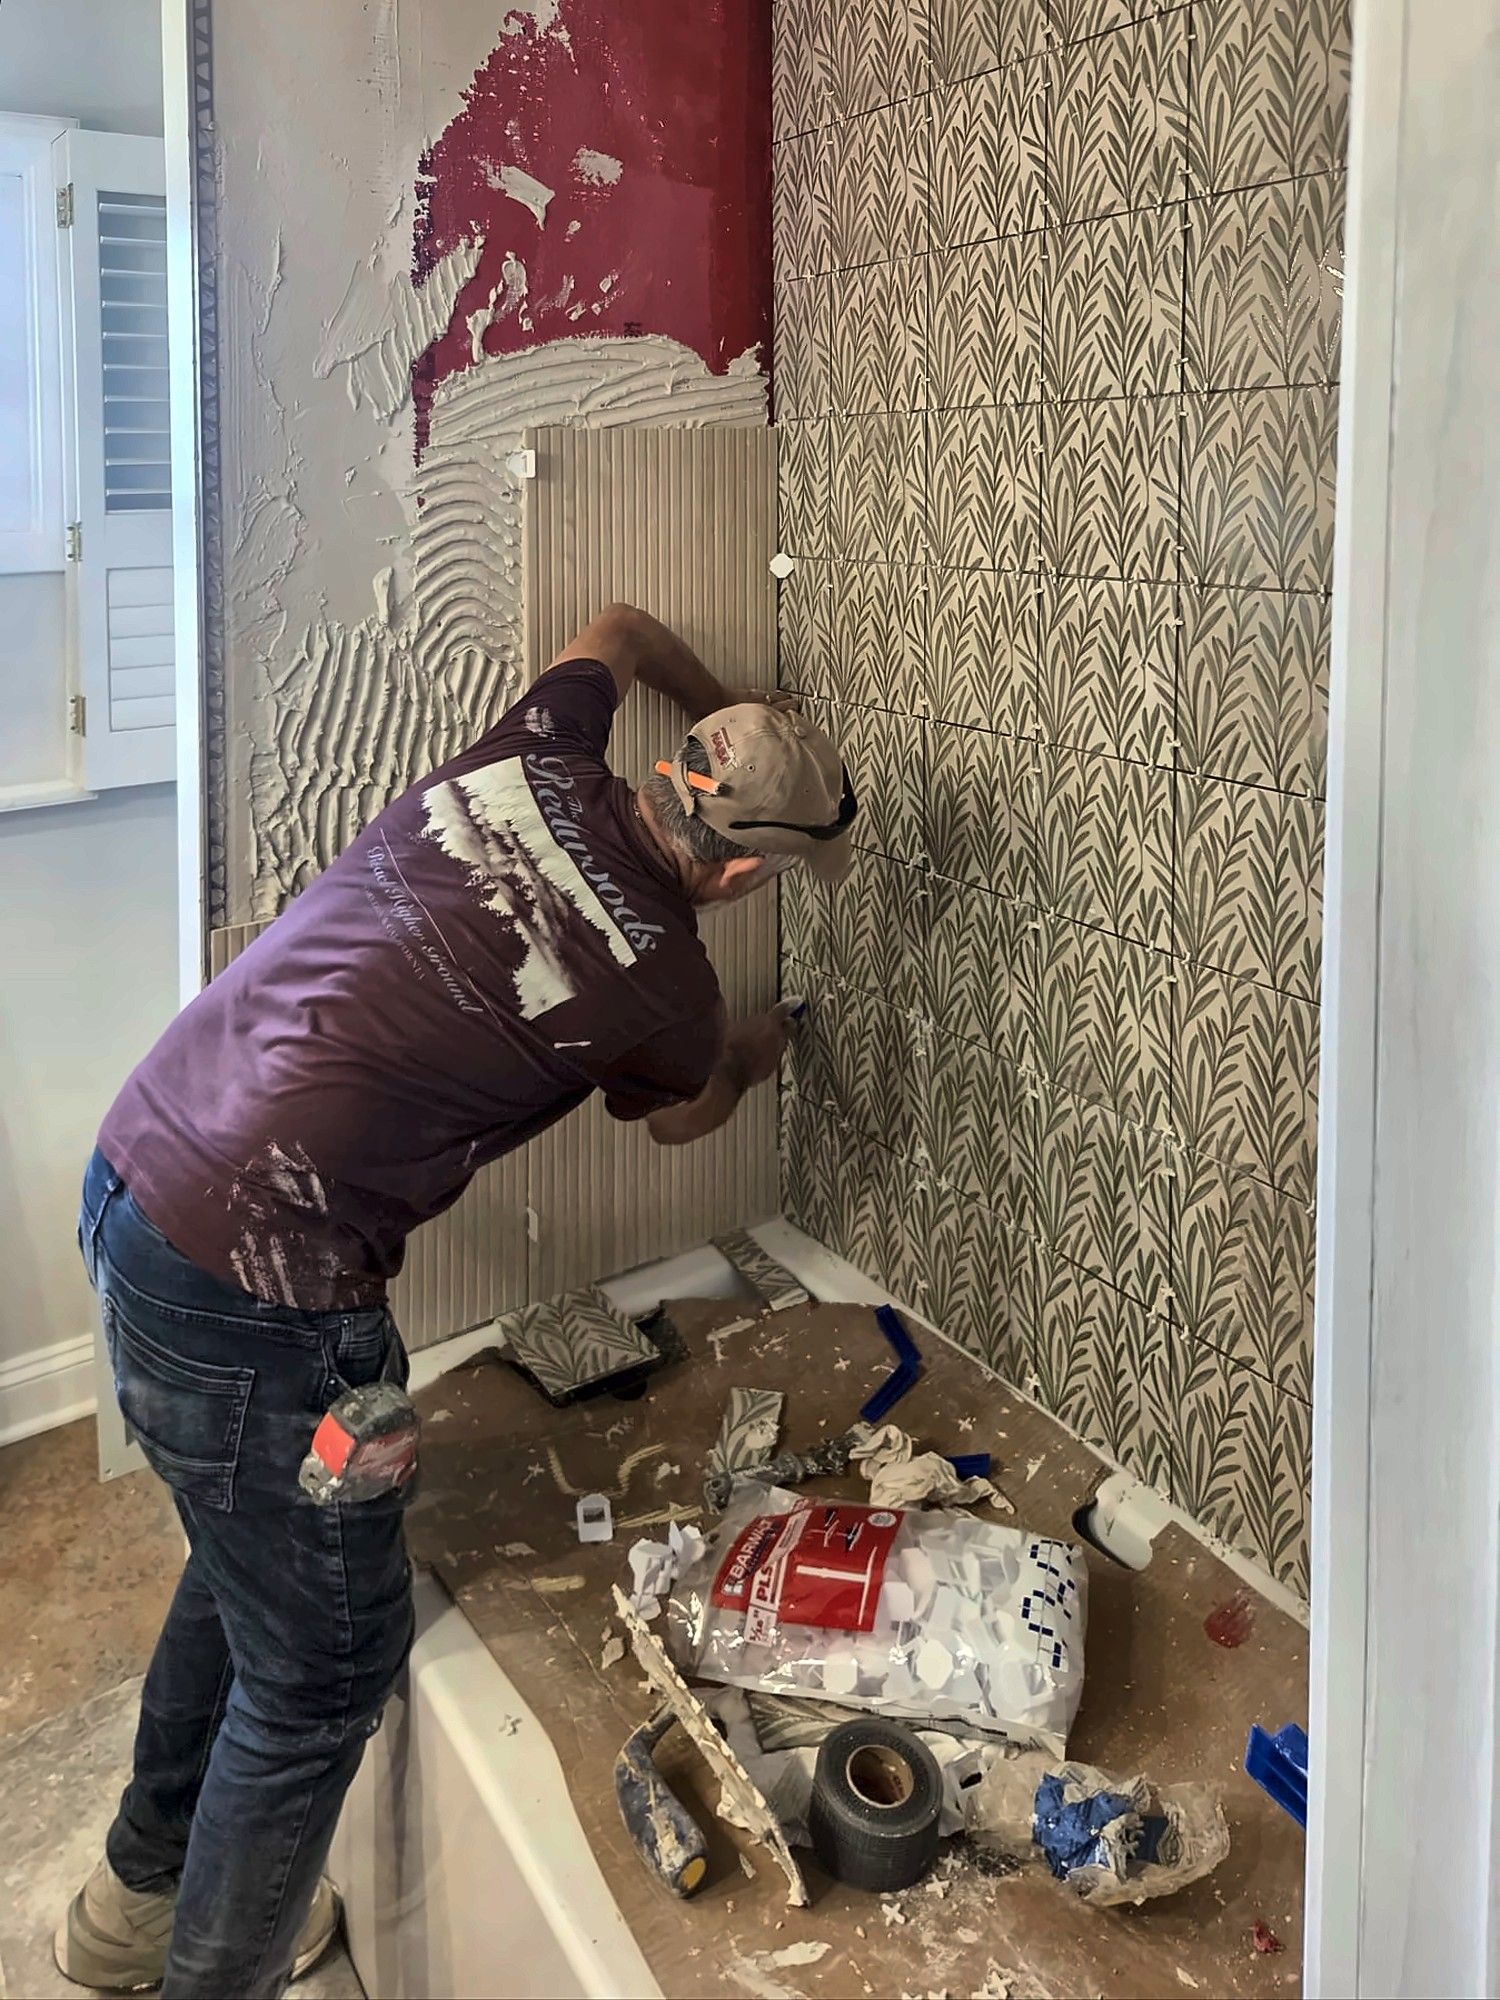
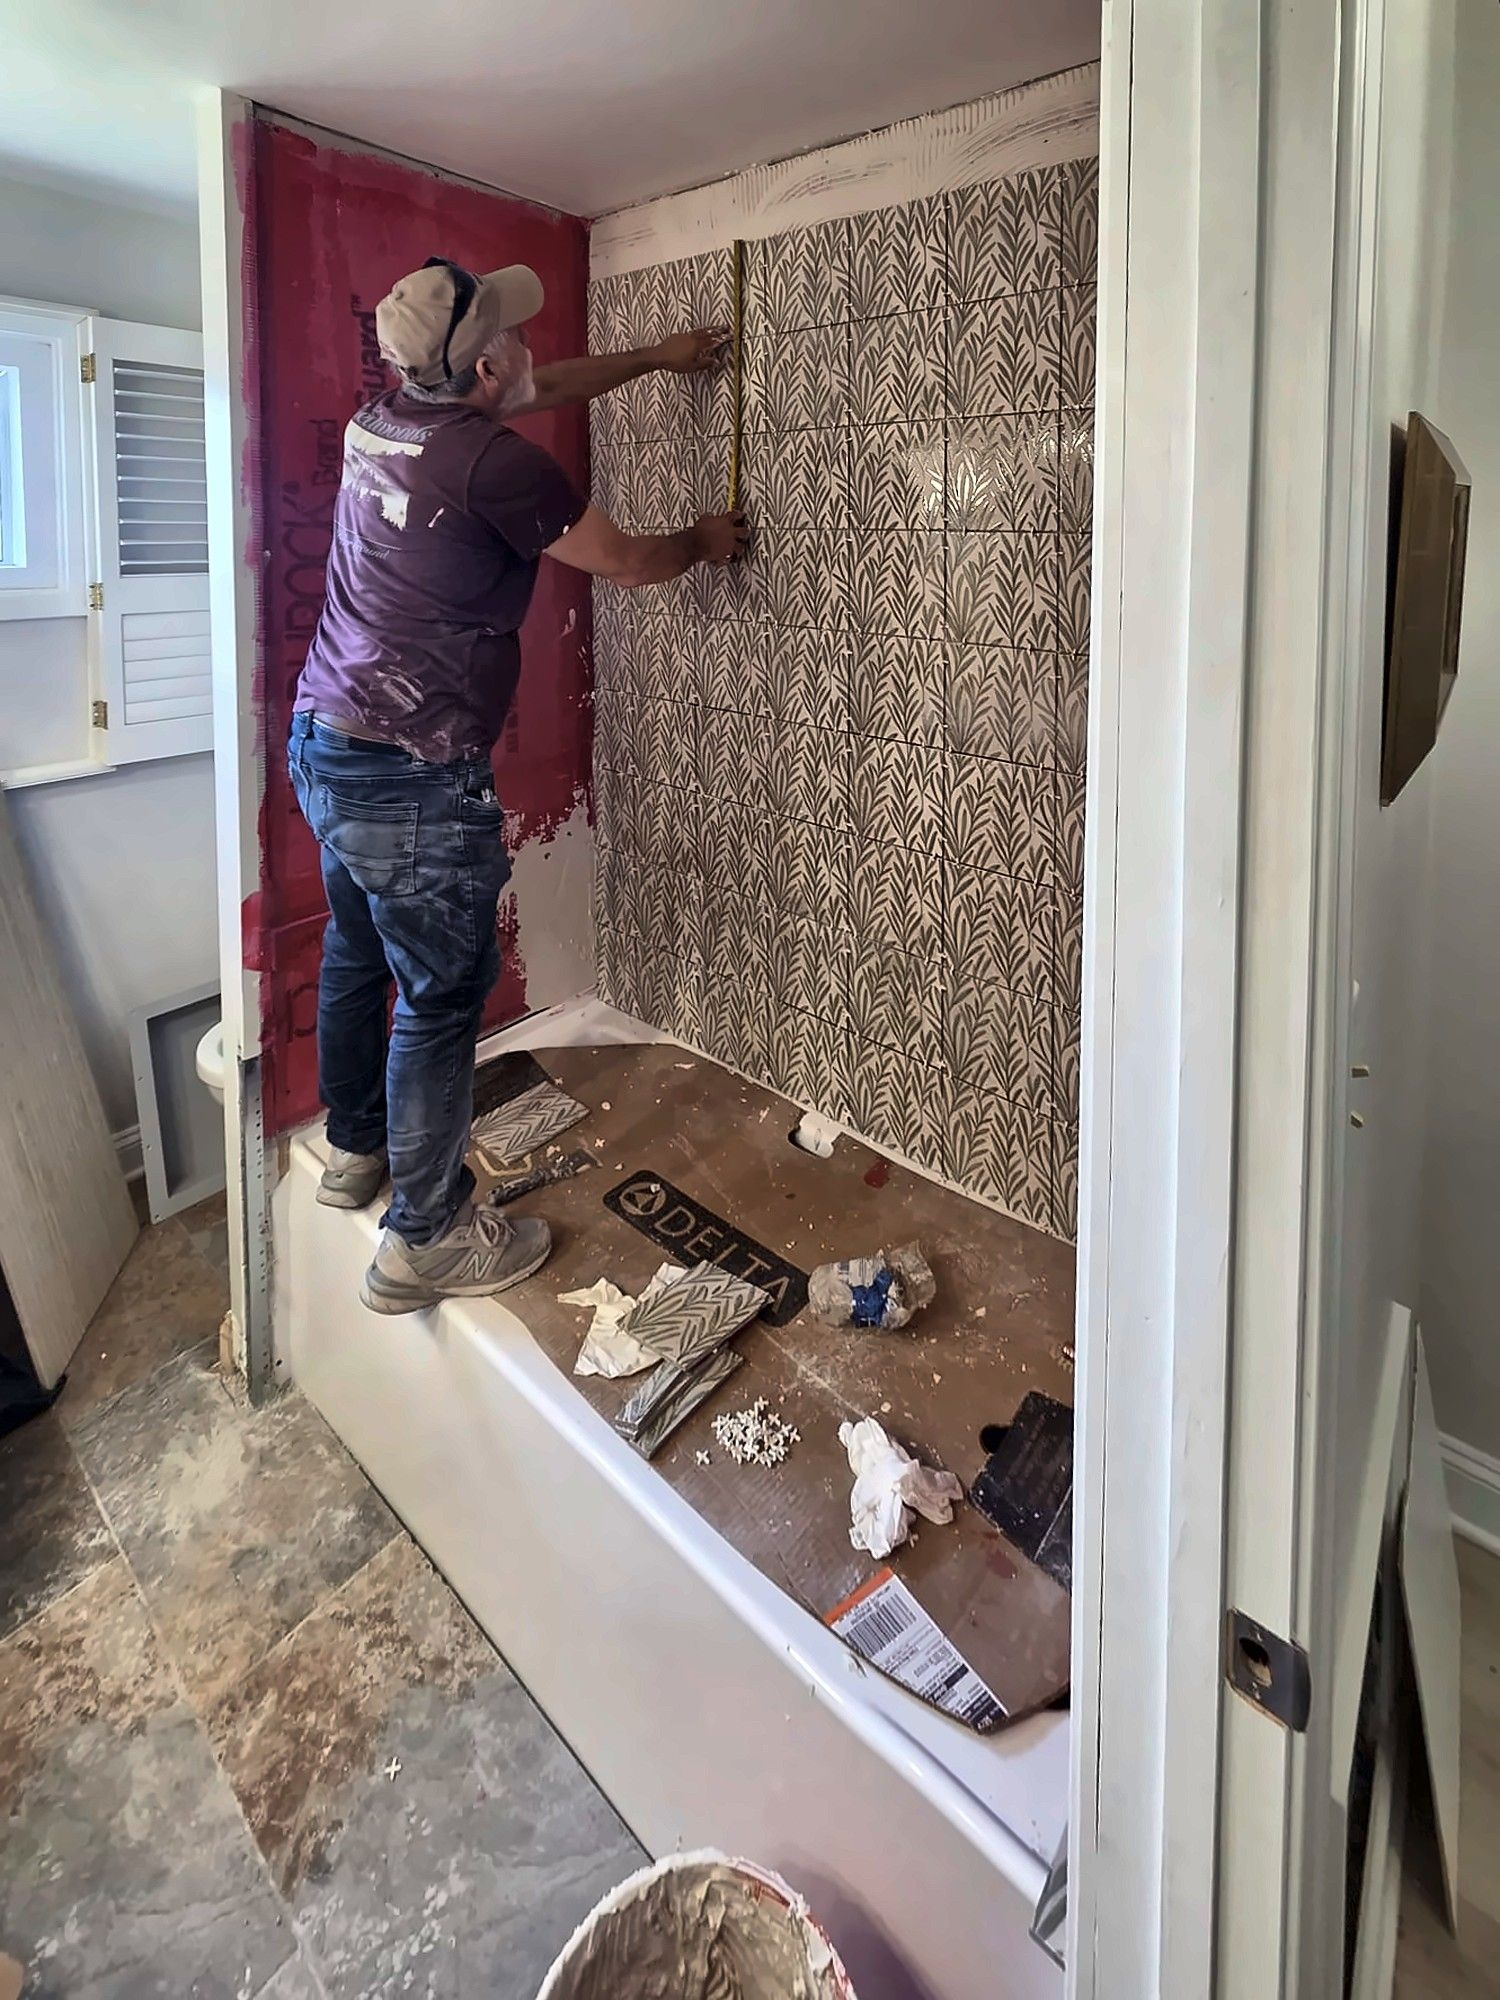
We put a red waterproofing membrane on the tub walls, and the tile setter laid tile directly over it. The membrane always goes on before any tile. Grout is not waterproof, so the membrane is what keeps water out of the wall behind it. We treat it as standard on our bathroom remodeling jobs. Nobody sees the waterproofing once the tile is up, and it is still the part that matters most.
From there the tile went up wall by wall, with materials staged on the tub deck. The leaf-pattern tile became the accent wall at the back of the tub. A pattern like that has to be laid out carefully so the design lines up across the whole wall.
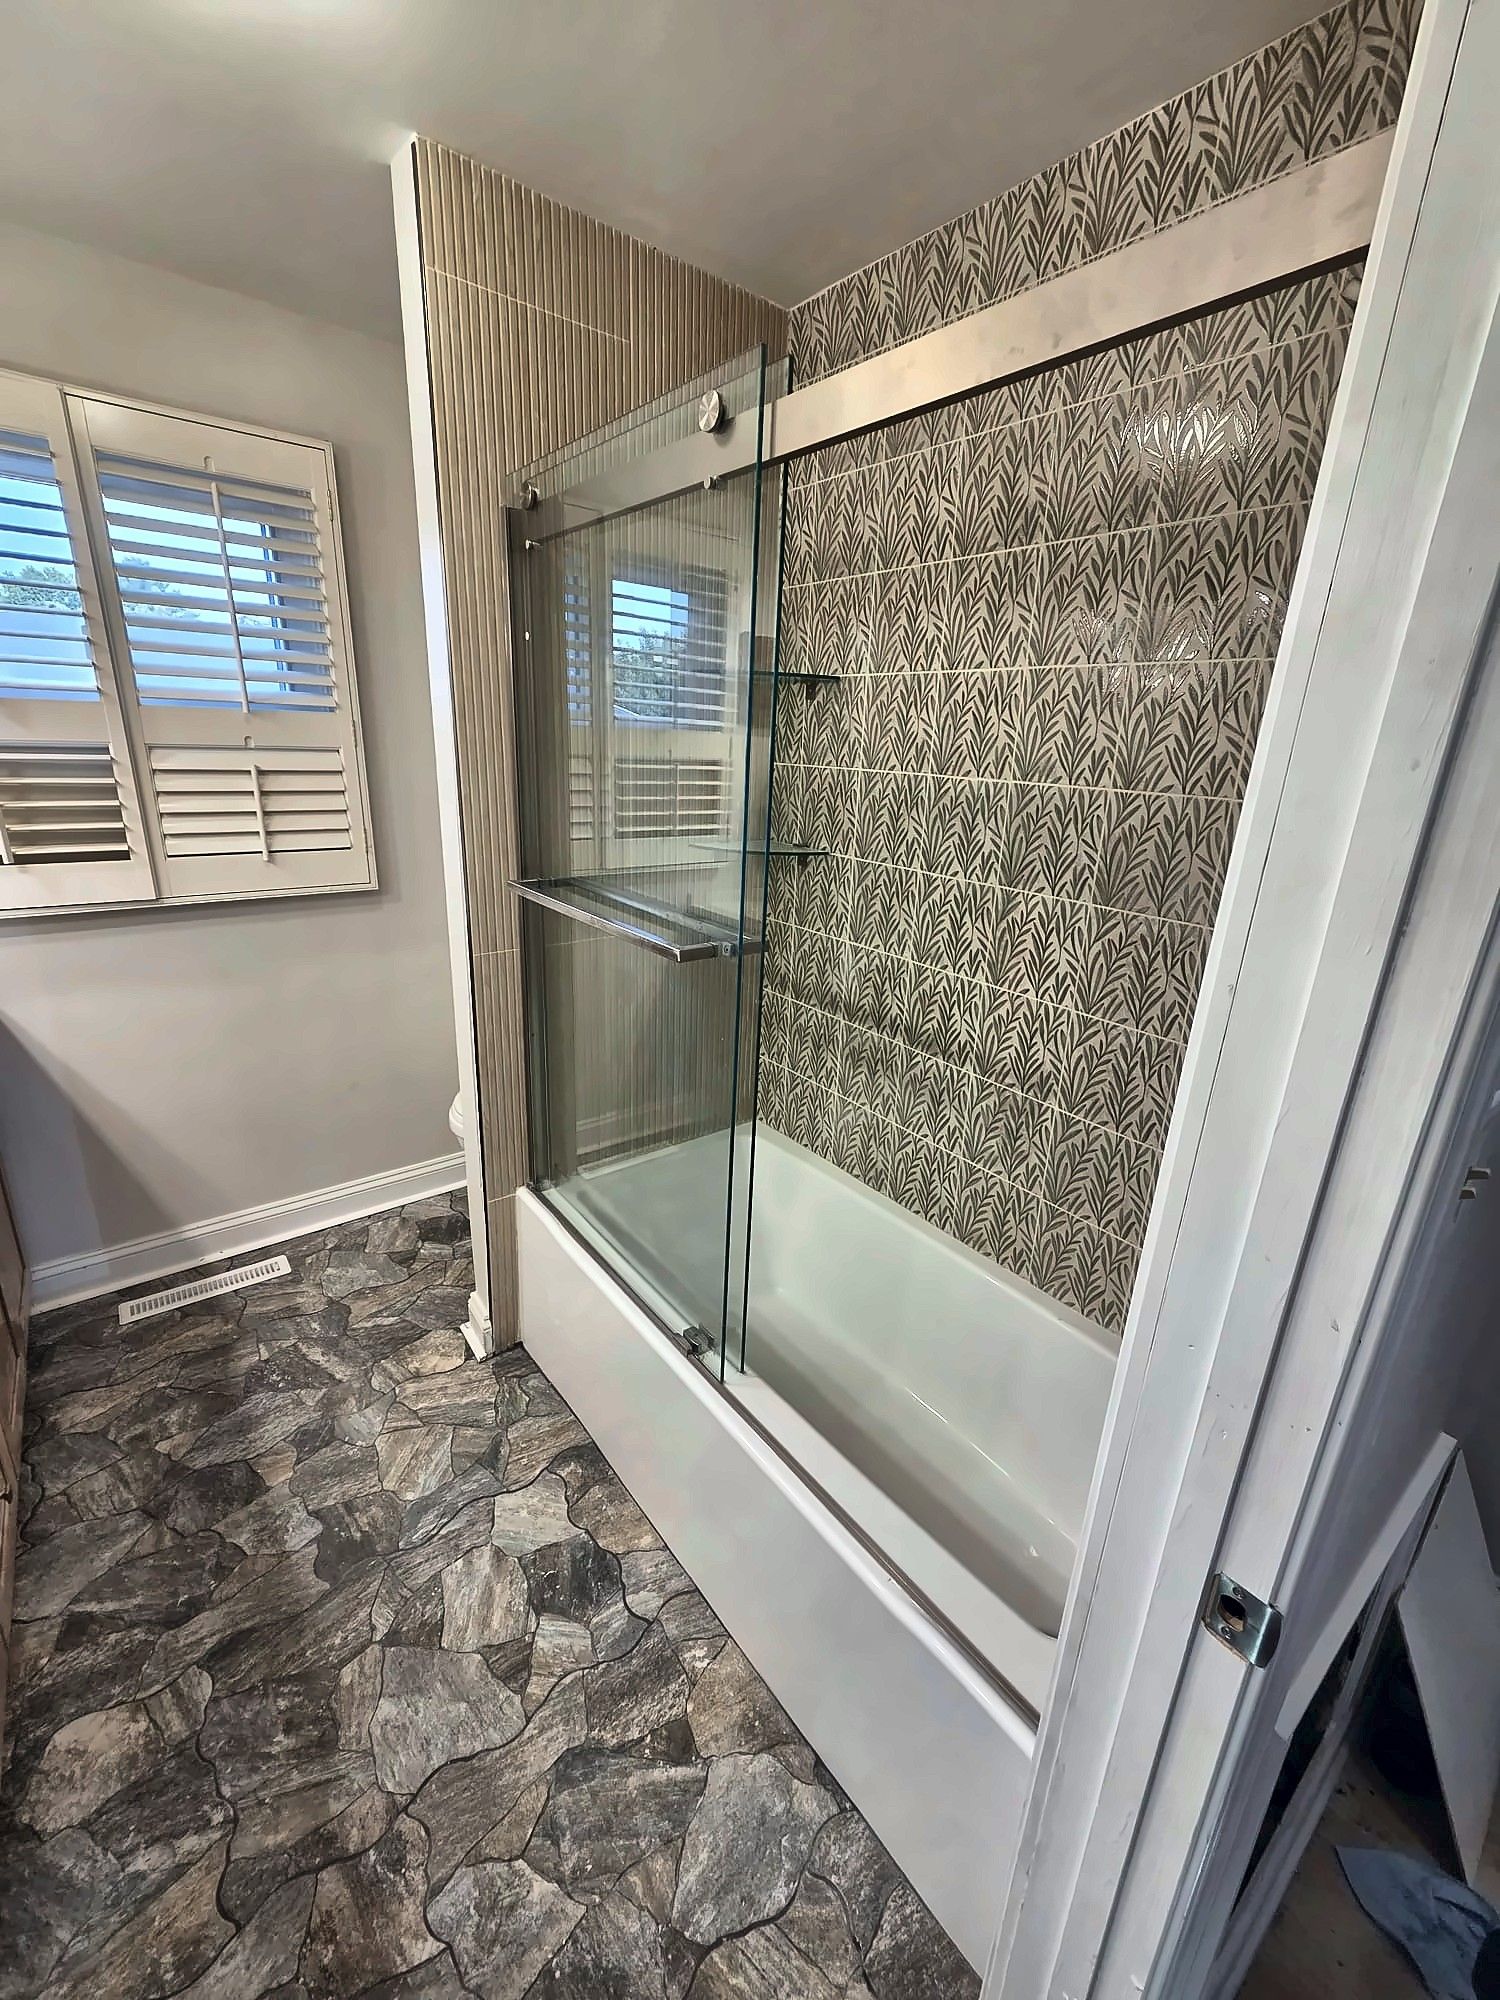
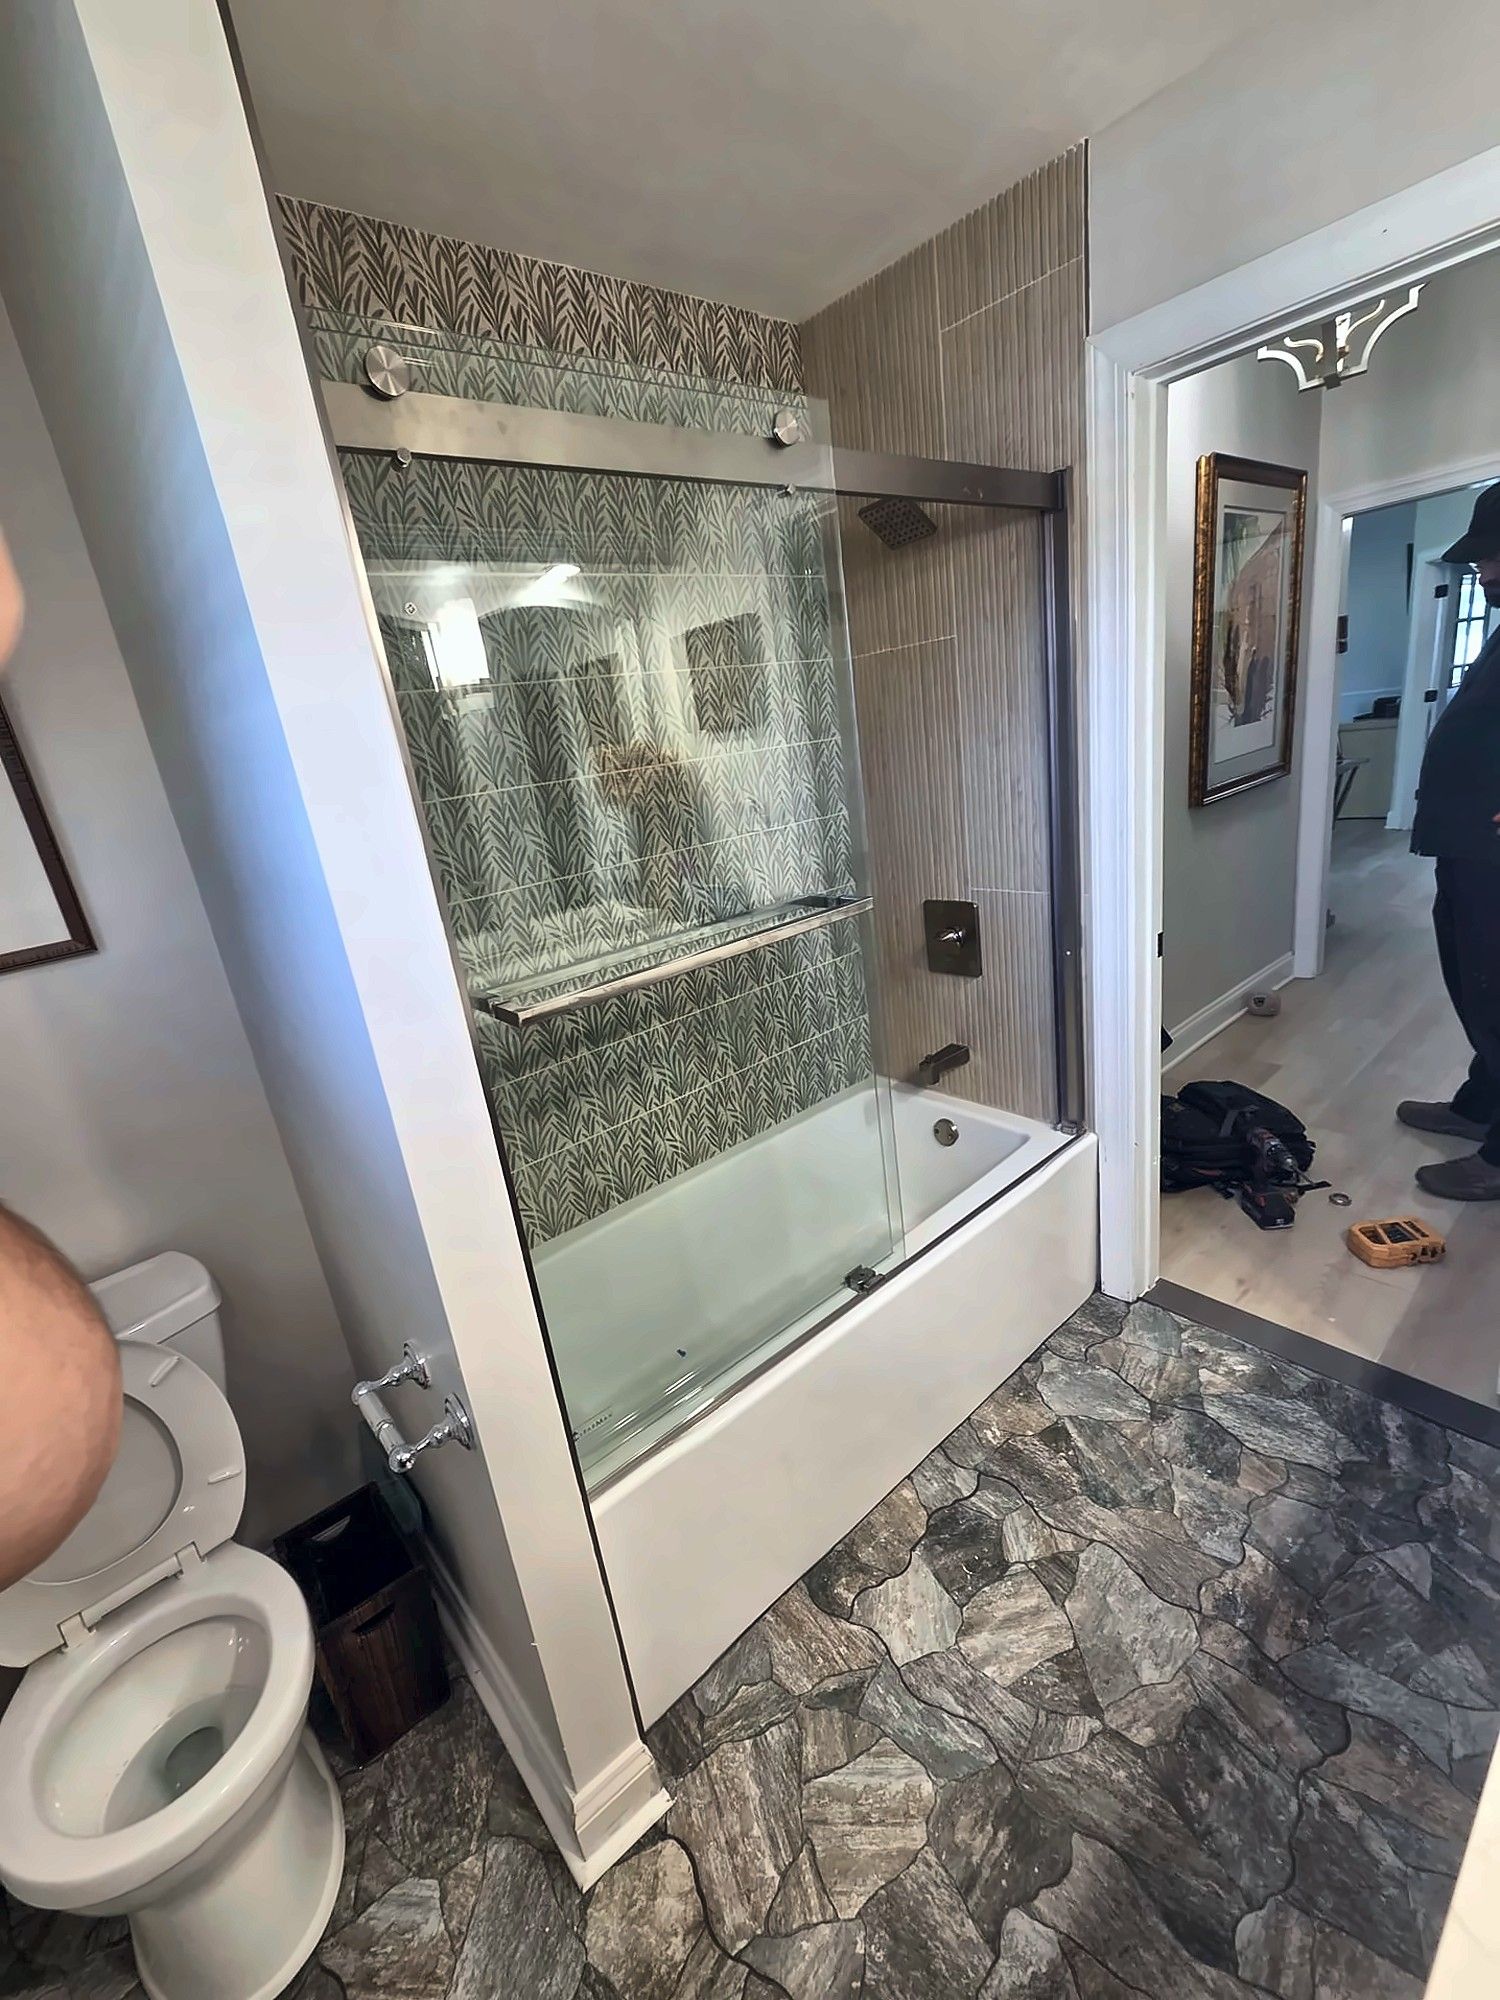
With the tile done, we hung sliding glass doors on the tub.
The finished bathroom
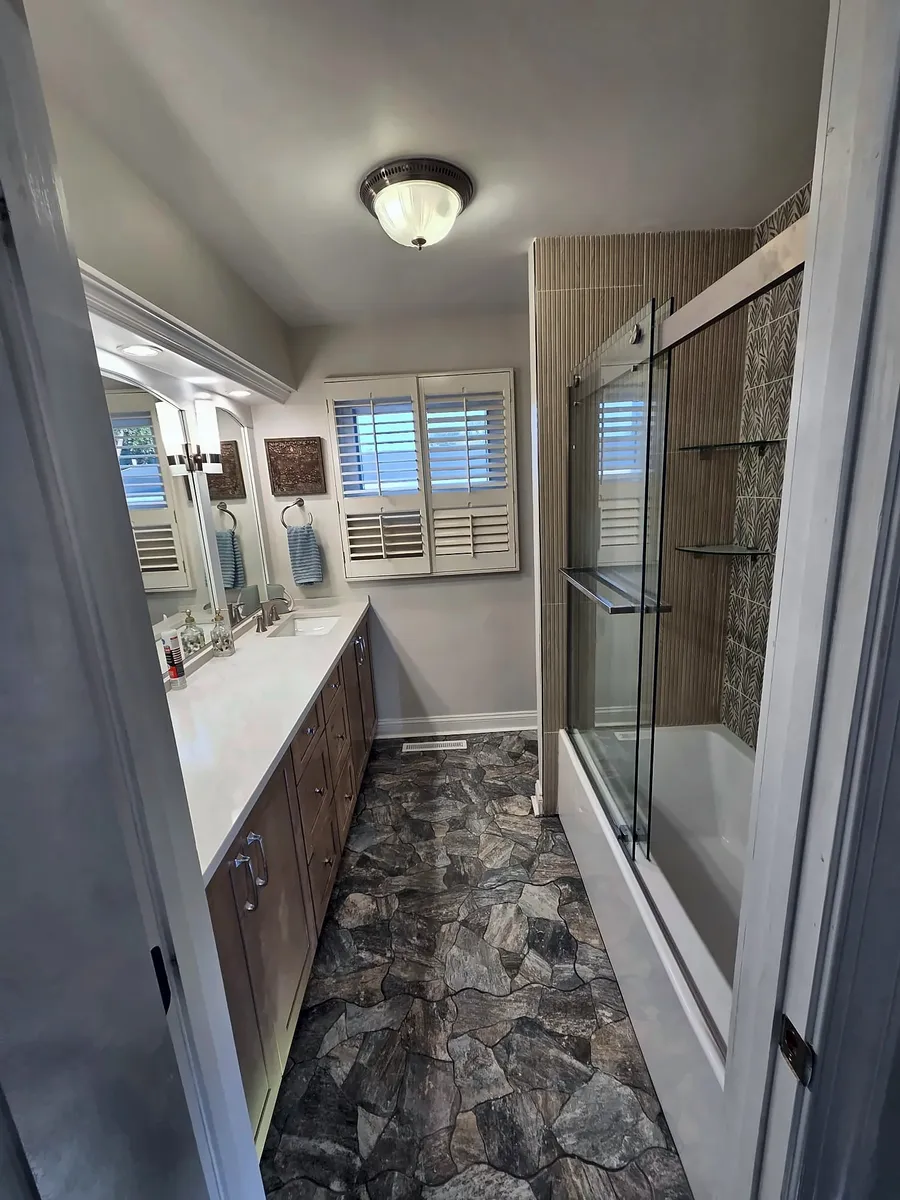
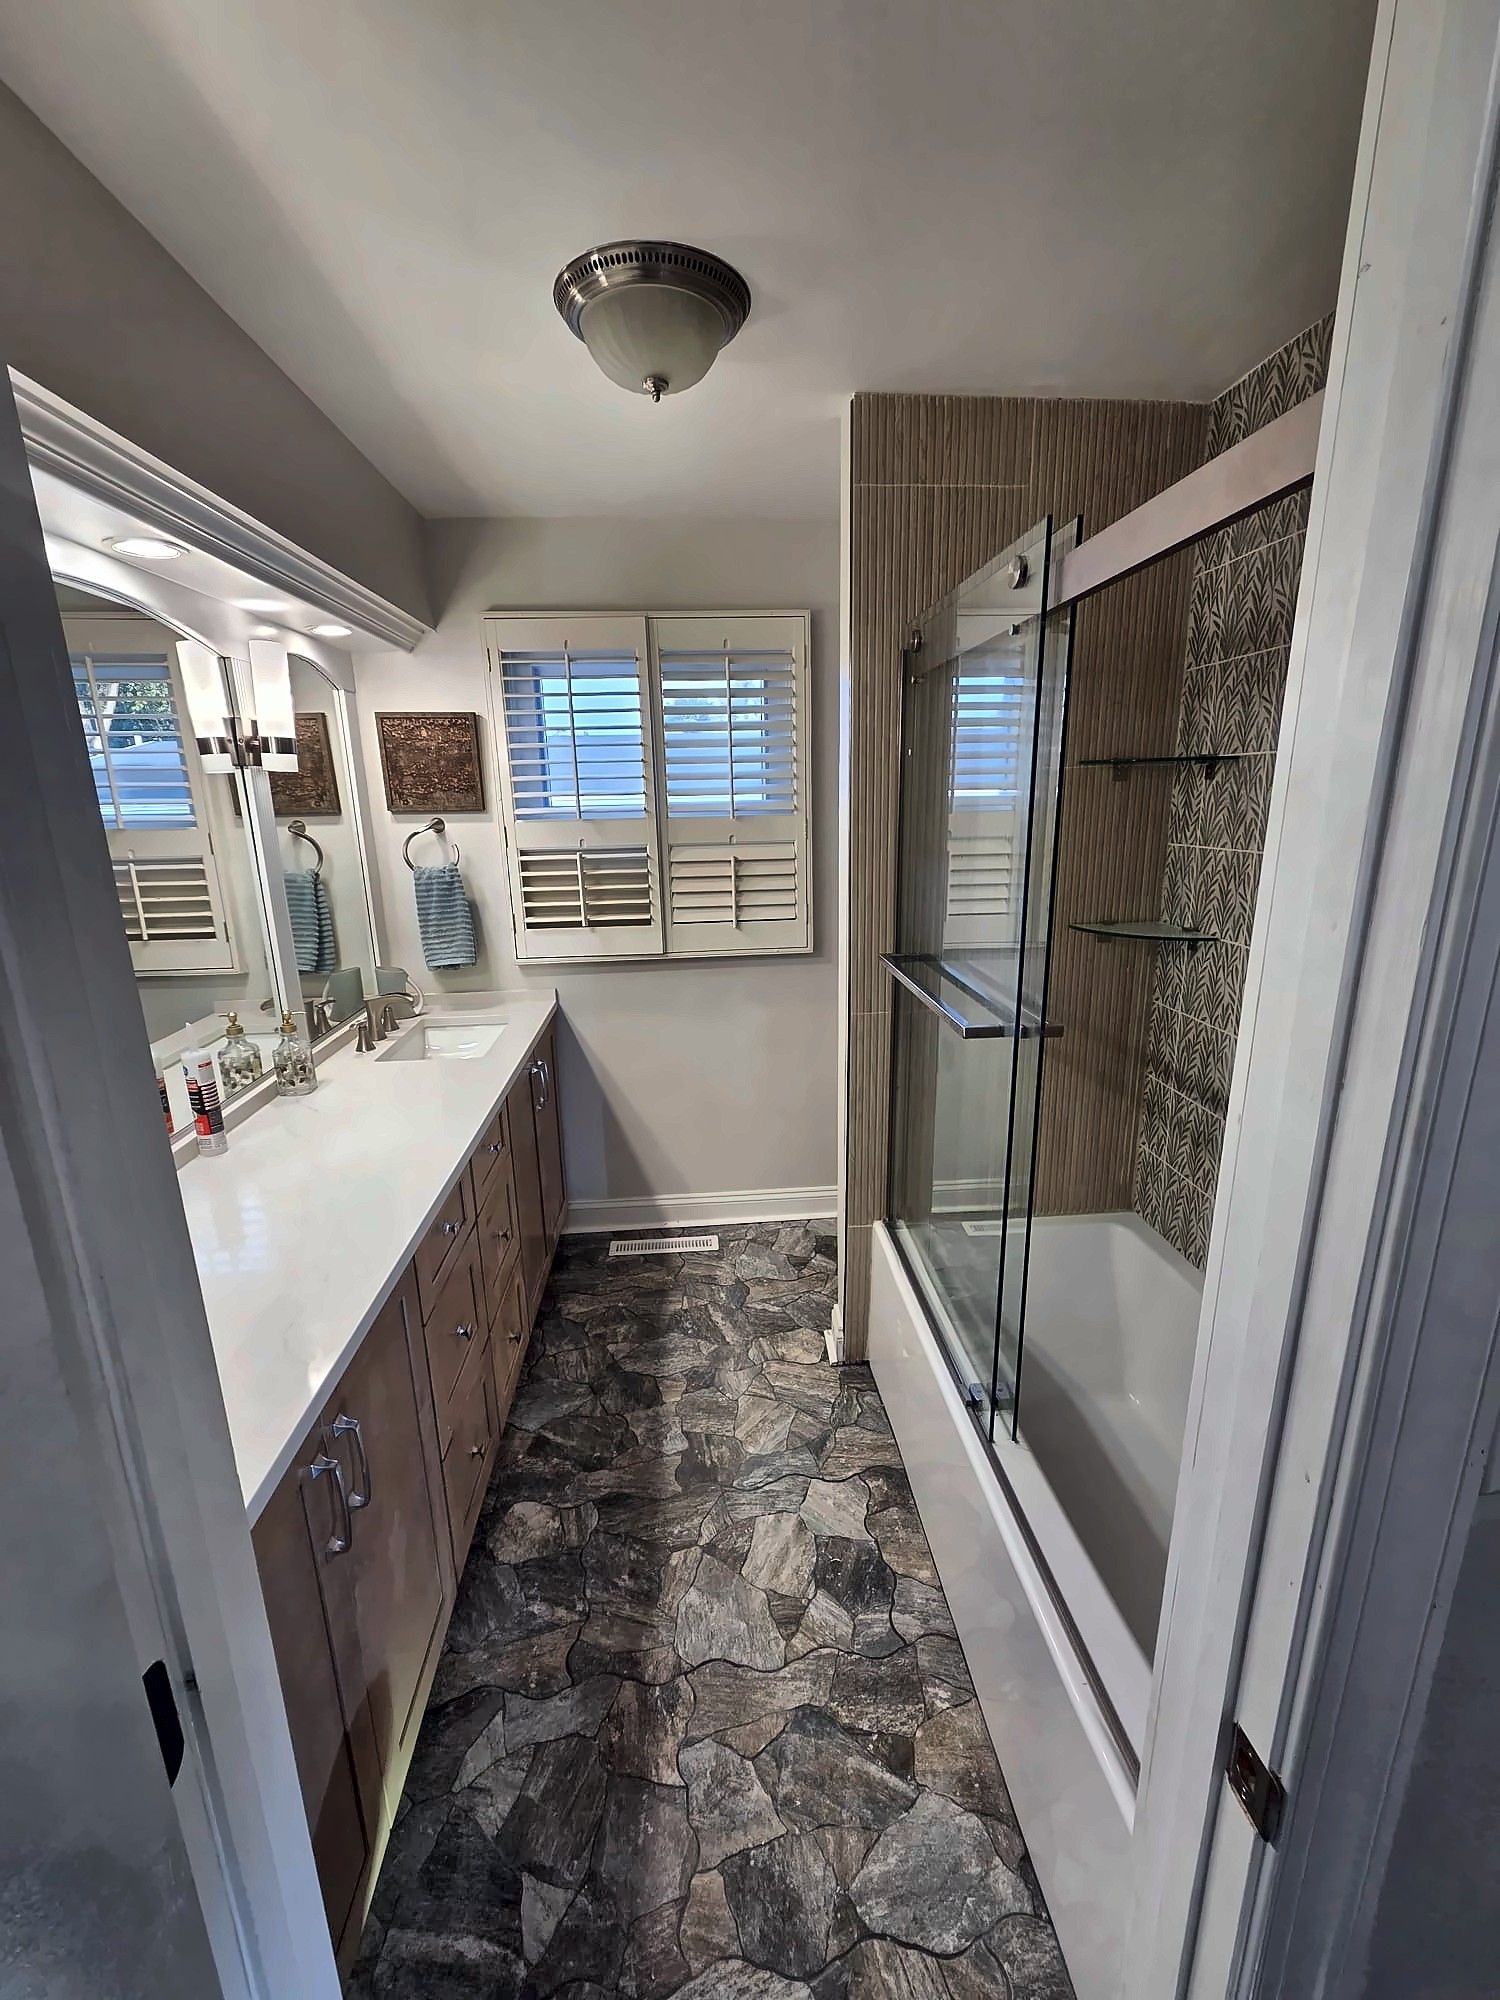
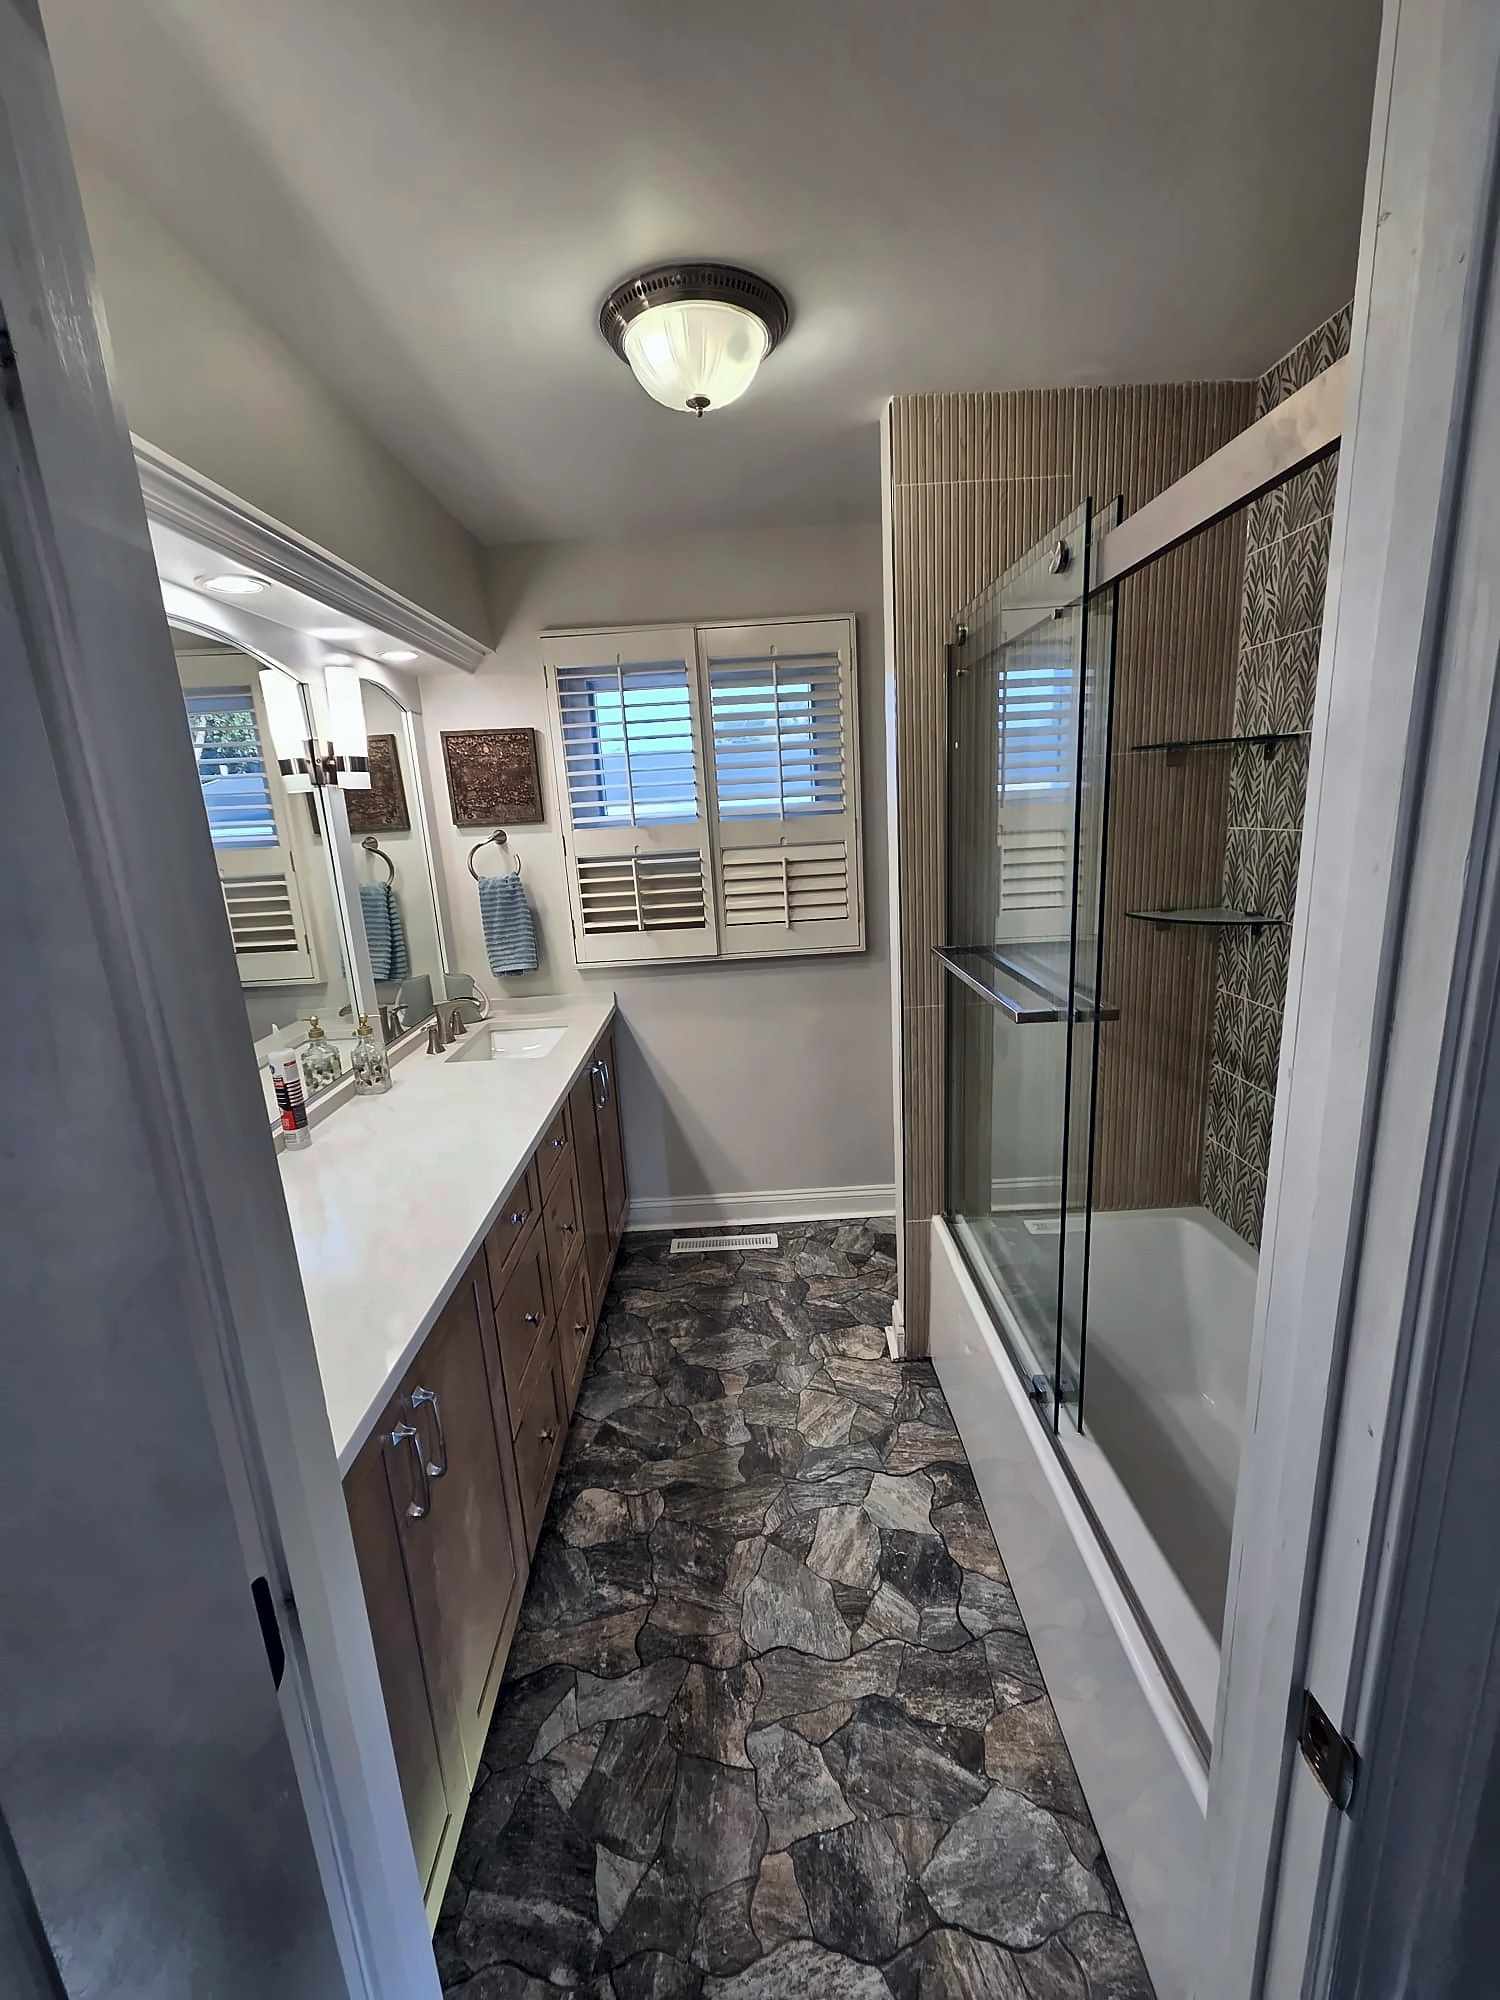
The room has a long vanity, sliding glass tub doors, a slate-look stone floor and plantation shutters on the window. Through the glass, the leaf wall is the first thing you notice. It gives a standard tub-and-shower layout real character.
Standing in the doorway, you have the vanity along one wall and the tub with its glass doors at the end, with the stone floor running through. It works as an everyday full bathroom, and the tub surround sits on a waterproofed base.
Photos from this job
Want results like this?
Estimates are free. Text a few photos to the number below and we can usually tell you what the job involves before we even come out.
Sun–Thu 8am–8pm · Fri 8am–4pm · Sat closed